Assalamualaikum wbt.
Posting ini berkenaan perkara penting untuk setup MinimOSD RM80++ yang selalunya sukar untuk dibuat dalam 1 malam. Berikut adalah perkaranya.
Bahan bahan
1. MinimOSD
2. FTDI
3. Software - Download file dari sini. Kemudian extract di pc. Seterusnya ikut step seperti diterangkan di sini.
//

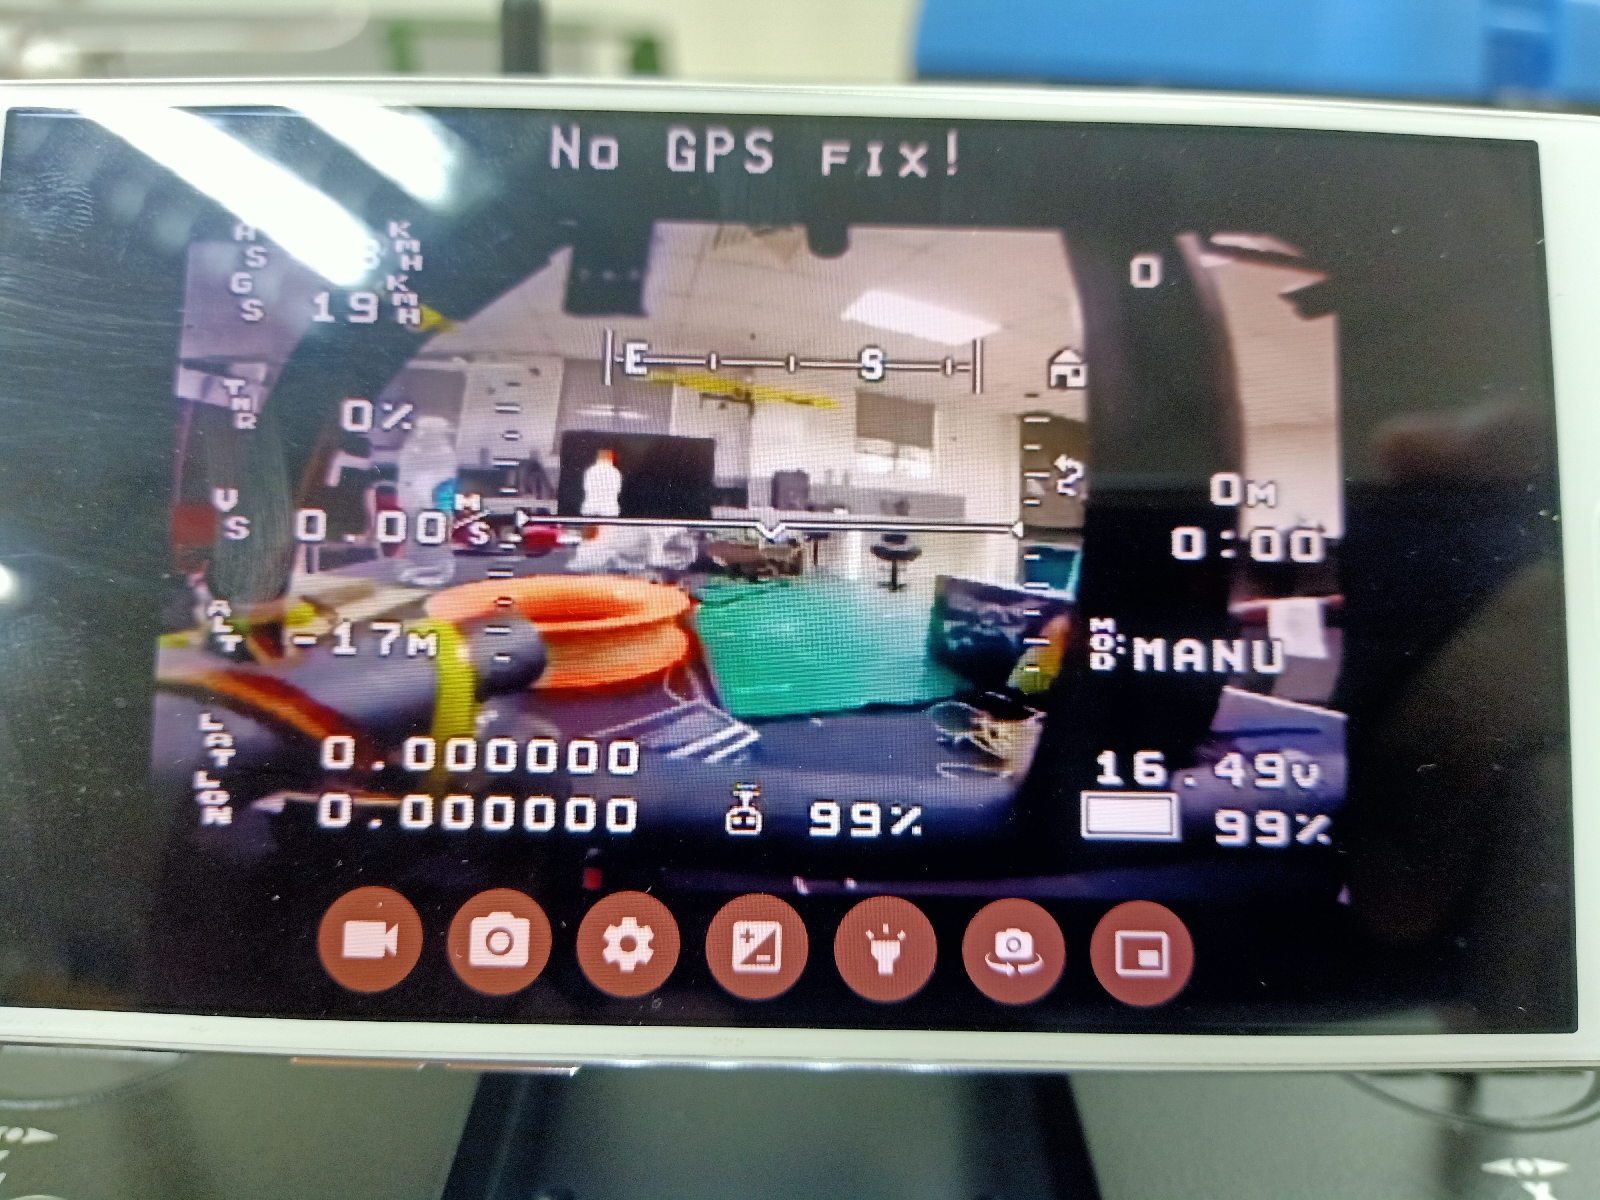
Penerangan berkenaan item item di dalam minimosd. (http://dronemission.com/buildadrone-plugNplay-osd.html)
Posting ini berkenaan perkara penting untuk setup MinimOSD RM80++ yang selalunya sukar untuk dibuat dalam 1 malam. Berikut adalah perkaranya.
Bahan bahan
1. MinimOSD
2. FTDI
3. Software - Download file dari sini. Kemudian extract di pc. Seterusnya ikut step seperti diterangkan di sini.
//
Quickstart Guide (c) Johnex
- Download the latest MinimOSD-Extra build here: https://github.com/night-ghost/minimosd-extra/blob/master/osd_latest.zip?raw=true <-- (link yang sama untuk download osd_latest zip.file).
- And then extract the downloaded files and locate OSD_Config.exe (Application).
- Run the OSD_Config.exe
- Connect your MinimOSD to your pc making sure you are using an FTDI that has 5V and not 3.3V.
- After the usb driver is installed, select your COM port in OSD_Config then click Read from OSD

- Click Options -> Update Firmware. Select the Character_Updater_FW.hex file from the "FW_+_Char" folder

- This is a character set uploader, so just click Options -> Update CharSet. Select the latest character set MinimOSD_2.4.1.X.mcm from the "FW_+Char" folder. Notice that this MimimOSD-Extra has a custom character set and must be updated if coming from another fork or the original, and some newer versions might require a new version, always check the "FW+_Char" folder.
- Click Options -> Update Firmware again. Select the latest MinimOsd_Extra_Uni.9XXDV-release.hex file from the "FW_+_Char" folder.
- Set your video mode to Auto if you have different cam types, or select NTSC or PAL if you have just 1 cam and you know it's type or had issues with Auto.
- Connect your OSD directly to a monitor or to a video transmitter so you can see the OSD output, making sure you don't forget to connect the antenna to the video transmitter before powering it on if you are using that. Click Options -> Load TLog. Select 2015-09-06 18-40-55.tlog from the "FW_+_Char" folder.
- Set up the screens as you want. Click "Save Tab to OSD" and then click "Start" to run a simulation so you can see how everything looks without having to set up a copter. If something is not right, click "Stop", do the changes, save the config again and click "Start" again to see the new changes.
- If you encounter that your screen is not centered, change the "Offsets", Left and Top from the config page. You can also move panels away from the edge if your screen gets cropped.


//
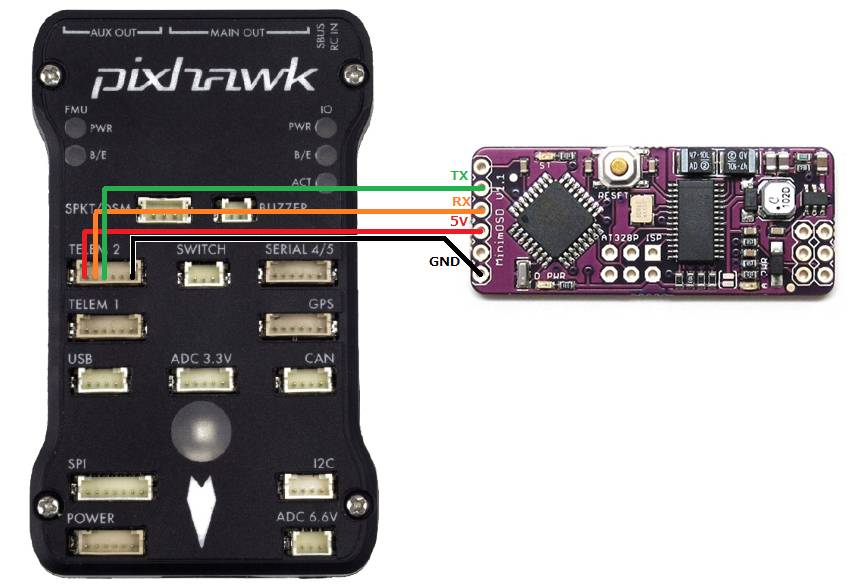
Untuk sambungan wayar, pastikan MinimOSD dibekalkan 12v input.

InsyaALLAH semua akan ok kalau sambungan wayar yang betul. Khususnya input 12v dari battery kepada power input di MinimOSD seperti gambar di atas.
Pada hari ni, selepas beberapa hari study di phone dan tanya kenalan di whatsapp baru boleh keluar rssi value dari pixhawk yang disambungkan kepada rx skydroid.

1. Di Rssi source pilih Channel 8.