
Friday, June 5, 2026

Monday, January 5, 2026
Swarming
Master - slave for raspberry pi setup.
https://www.instructables.com/Installing-MQTT-BrokerMosquitto-on-Raspberry-Pi/
Monday, March 17, 2025
Thursday, December 19, 2024
Dronekit
Copy: Ctrl + C <<<important
Paste: Ctrl + Shift + V <<<important
Step 1. <<<important
Step 1. <<<important
2. Download Rufus
3. Get 16gb pendrive and flash with ubuntu image.
***********notes*****
Connect a Python Script to a Drone (part 1) :https://www.youtube.com/watch?v=pcVe45DCV8A
Connect Python Script to Simulated Drone (part 2) : https://www.youtube.com/watch?v=-91VB6zuK5A
Fundamental basic : https://www.youtube.com/@prandtlmayer
Beginner : https://www.youtube.com/watch?v=4GZpSZQ2gJw
Intermediate : https://www.youtube.com/@PankajMali
note:
Pi Zero Drone Build:
Pi Zero drone
DIY Drone light show
Can a 3D Printer Race Plane Withstand 100 MPH?
Tiziano Fiorenzani Channel
Code Python with Blocks
How to control a drone with python <<<important
Control a drone with paper, not rc controller
IP Based MAVProxy Control <<<important
https://dojofordrones.com/what-is-mavproxy/ ---what is mavproxy
https://www.youtube.com/@PankajMali ---PankajMali
https://www.youtube.com/watch?v=CtS17WX40iM ---install ubuntu <<<important
https://www.youtube.com/@ardupilot19/videos -ardupilot
https://discuss.ardupilot.org/t/mavlink-step-by-step/9629 --what is mavlink
https://www.youtube.com/@alirezaghaderi/videos -- Good future for mavlink with complete tutorial
unlimited range pixhawk telemetry <<<important
Mavlink anywhere <<<important
**************
unlimited range pixhawk telemetry <<<important
Mavlink anywhere <<<important
**************
To setup sitl in ubuntu <<<important
*1. Follow this link
*2. To use Dronekit, type into terminal: python -m pip install dronekit mavproxy
To run Simulation <<<important
1. Open Terminal
2. Type:
cd ardupilot/ArduCopter
thensim_vehicle.py --console --map -w
Alternatively, if not starting in the ArduCopter directory, but at the base ardupilot directory:
4. Change to Guided Mode: Mode guided <<<important
5. Arm: arm throttle
6. Takeoff: Takeoff 100
7. Landing: mode RTL
8. Disarm: Disarm
Command |
Description |
|---|---|
rc N PWM |
set RC channel N override to PWM (PMW =0 disables override) |
link list |
List all links |
link set N |
Set link N to primary |
link add X |
Add new link |
link remove N |
Remove link |
wp list |
Download and show waypoints |
fence list |
Download and show geofence |
fence enable |
Enable geofence |
fence disable |
Disable geofence |
arm throttle |
Arm vehicle |
disarm |
Disarm vehicle |
disarm force |
Force vehicle disarm (heli) |
auto |
Engage auto mode |
wp set N |
Set current auto waypoint to N |
setspeed N |
Override auto speed to N m/s |
param show X |
Show current value of parameter X |
param set X N |
Set parameter X to value N |
param download |
Download parameter definitions from ArduPilot website |
param help X |
Display definition of parameter X |
mode loiter |
Engage loiter mode |
mode rtl |
Engage rtl mode |
mode manual |
Engage manual mode |
mode guided LAT LON ALT |
Engage guided mode and move to specified location |
relay set N [0|1] |
Set relay N to open or closed |
servo set N PWM |
Override servo N to PWM value |
terrain check LAT LON |
Get terrain height at specified location |
formatsdcard |
Formats SD card |
ctrl + C = to end simulation <<<important
type Command / Help for more.
*****
To run sitl with gazebo, follow this link.
Start the Simulator with Gazebo <<<important
In a terminal window start Gazebo:
gazebo --verbose worlds/iris_arducopter_runway.world
In another terminal window, enter the ArduCopter directory and start the SITL simulation:
cd ~/ardupilot/ArduCopter
../Tools/autotest/sim_vehicle.py -f gazebo-iris --console --map
Run the simulator with python script <<<important
Copy and paste python script (ex. demo.py) in the ardupilot/arducopter folder.Open new terminal and type: pyton demo.pyEverything should run. Next....mission planner in ubuntu. Friday, June 21, 2024
Programming Library - FUN - and - a - mental
This video explains Drone Programming Libraries that can be used as companion computer.
1. MAVROS : Latest library that can be use to connect between more sensors
2. Pymavlink : More fundamental programming to connect with mavlink.
3. Dronekit : Much simpler programming
4. MAVSDK : Suitable for PX4 and not ardupilot
This video will show the steps to Install mission planner in ubuntu.
once everything installed, open new terminal, type in mono MissionPlanner.exe to launch Mission Planner. Mission Planner should open in few seconds, select UDP and connect to 14550.
*********490:~/Downloads/MissionPlanner-latest$ mono MissionPlanner.exe
https://github.com/terrytaylorbonn/auxdrone/wiki/Latest-progress?fbclid=IwZXh0bgNhZW0CMTEAAR2P2L_mZG9keHsYHvAhA0mSwKeKb8l52aq1_CbQDTrvGZ8qlSvgtZN9kcM_aem_SaXytFx5VfAHAsw3_iX6ng#240619-evening--first-successful-ai-object-recognition-person--cc-forces-land--outdoor-test-
Thursday, June 20, 2024

Thursday, June 13, 2024
Ardupilot MinimOSD Setup with Config Tool and FTDI USB Adapter, EZUHF Setup
https://www.youtube.com/watch?v=dZLycZtsoZ0&list=PLDpsqvUKcRktPga6x6EPFSMZya3syk4PV&index=2
Friday, June 7, 2024
Servo ardupilot control
Servo Control
****************
1. Connect servo to Servo 5 (MainOut 5).
2. Select RCIN5 if the detected Channel is channel 5.
3. Make sure servo rail got power.
Wednesday, February 21, 2024
Flight Training with Fixed Wing.
Half day of setup and half day of flying.


Together with Aisyah, Danzo and Fauzan, students from Sc Aerospace Engineering.
The fixed wing drones flies automatically while we are taking photos of us and her.
Alhamdulillah for the good weather.
10.00 until 12.30
21.3.2024
USM
Wednesday, January 3, 2024
Wednesday, November 22, 2023
Convert flysky from 6 ch to 10 ch.
NOTES
1. Tutorial to do this
https://www.youtube.com/watch?v=t1zBxB1FJaQ
2. Important to follow this.
Firmware Version Number won't show + "Device is not connected"
https://github.com/benb0jangles/FlySky-i6-Mod-/issues/102

STEP-BY-STEP
Step 1.


Download .exe from this link (https://github.com/benb0jangles/FlySky-i6-Mod-/tree/master/10ch%20Mod%20i6%20Updater/10ch_MOD_i6_Programmer_V1_5)
Step 2.
Connect wiring like this
Important to Remove the ATMEGA CHIP !!

Step 3.
Make sure to have every cables connected, then connect arduino uno to the laptop
Step 4.
Make sure Port is detected in Device Manager. Change the port to 1 - 8, in advanced mode.
Step 5.
Open Exe.
Step 6.
Open Port.
Step 7.
Program.
Finish.
Tuesday, November 21, 2023
Ardupilot - Middle Throttle Stick.
Credit to this instruction
PILOT_THR_BHV set for a value of 7. Also set MOT_HOVER_LEARN to a value of 2, for learn and save. Your hover throttle will be set automatically while hovering.And this will only work for Alt Hold and Loiter Flight Mode.
Monday, November 20, 2023
Ardupilot - Arming Switch
Config > Full Parameter Tree > RC7_option > Set to 153 > Save parametes\rs
Optical Flow Setup with Ardupilot
This is a video that can be used to setup optical flow.
Optical flow that is use is like this.
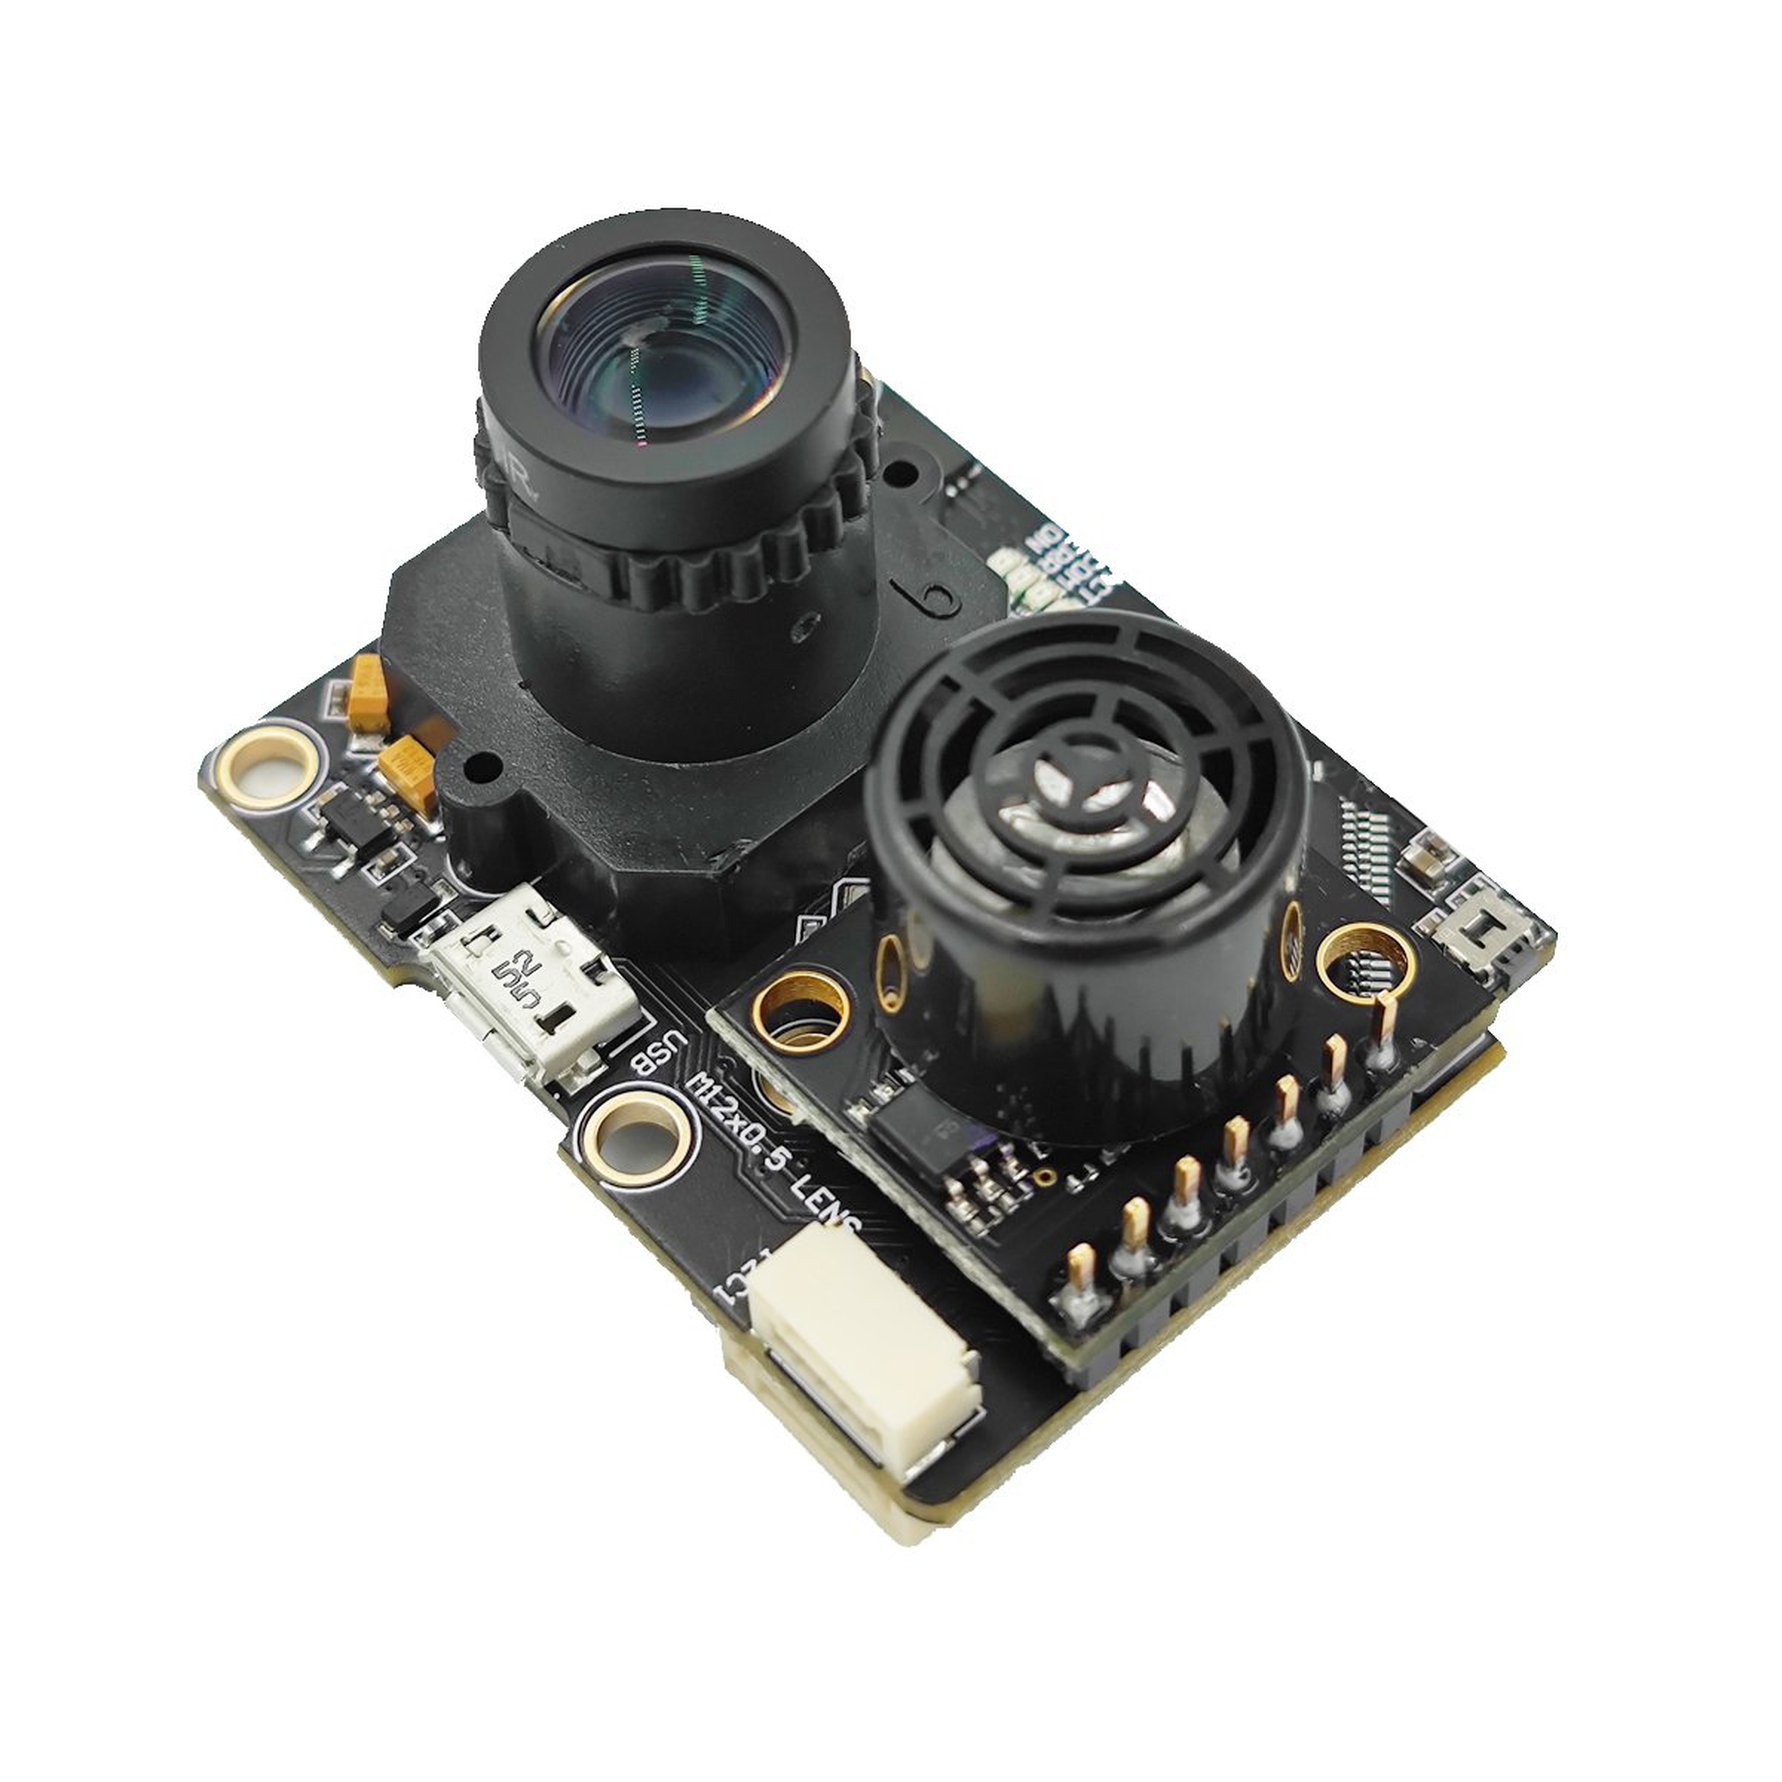
Optical Flow V1.3
Until last progress 20/11/2023:
Do the work for 2 days.
Setup:
There will be a problem about the driver of the opt flow, when you connect the opt flow directly to the computer using USB Cable. Therefore, please make sure:
1) The opt flow is connected to the pixhawk flight controller to i2c.
2) Then power up the pixhawk normally using Lipo Battery.
3) The driver issue will be solved after 12v battery connected.
Result:
1) Images is detected by the Optical Flow ok.
2) Focus Image is ok.
3) Mounting to the drone is ok.
Problem:
1) Already test flight and cannot hover in place maintaining position.
2) The sonar is not showing any value, so i am using the lidar a that time, but the lidar seem to have problem, up and down, maybe the lidar were broken.
Info:
1) Height estimation need to be used before the pixhawk can be armed.
Documentation:
At this time, I only follow step 1.
Due to time constraint, didn't go to step 2.
Monday, October 16, 2023
17 october 2023

RMAF Skuadron 16 landing gear collapsed upon landing, Subang Airport.

25.10.2023 USM RC PLANE CLUB BANNER



MOTIVATION 3
Wednesday, September 20, 2023
Aerial Mapping using dji mavic air
Apps that is used is
1. Drone Deploy (www.dronedeploy.com)
2. Drone Harmony (https://droneharmony.com/)
Affordable image stitching
1. Maps made easy (https://www.mapsmadeeasy.com/)
1st trial on 19.9 and 20.9

Flown with dji mavic air with 100 images, 2 times flying, using drone harmony mobile apps, and stitch using drone harmony web for free, trial version.

Flown with dji mavic air with 30 images, 1 times flying, using dronedeploy mobile apps, and stitch using drone harmony web for free, trial version.

With the students postgrad and undergrad to see the mapping process using mavic air

The mapping setting

The plan catalog. I used Top Down for this mission
Monday, September 11, 2023
Tuesday, August 22, 2023
Mini Crossbow antenna Tracker
MFD Mini Crossbow Antenna Tracker.
Setup
***********************************
Right Port
Bluetooth HC-05
Bluetooth HC-05 - MFD Right Port
Tx - #1 (Right Port)
Gnd - #5 (Right Port)
5V - #1 (left Port)
Right Port Baudrate: 9600
Protocol: MAVLink
Protocol: MAVLink
*********************************
**********************************
Left Port
GPS M8N
M8N GPS - MFD Left Port
Red Wire - #1 (left Port)
Green Wire - #4 (Left Port)
Green Wire - #4 (Left Port)
Black Wire - #5 (Left Port)
Left Port Baudrate:9600
Protocol: LocalGPS
************************

Markings for both Right and Left MFD Mini Antenna Tracker.

M8N Gps wires (Red, Green and Black)
Blue wires is coming from bluetooth module. (HC-05)
Blue wires is coming from bluetooth module. (HC-05)

GPS is mounted away and same direction with tracker.

GPS value from external shown as (L)
GPS value from aircraft without (L)

<<-- Left Port Right Port -->>
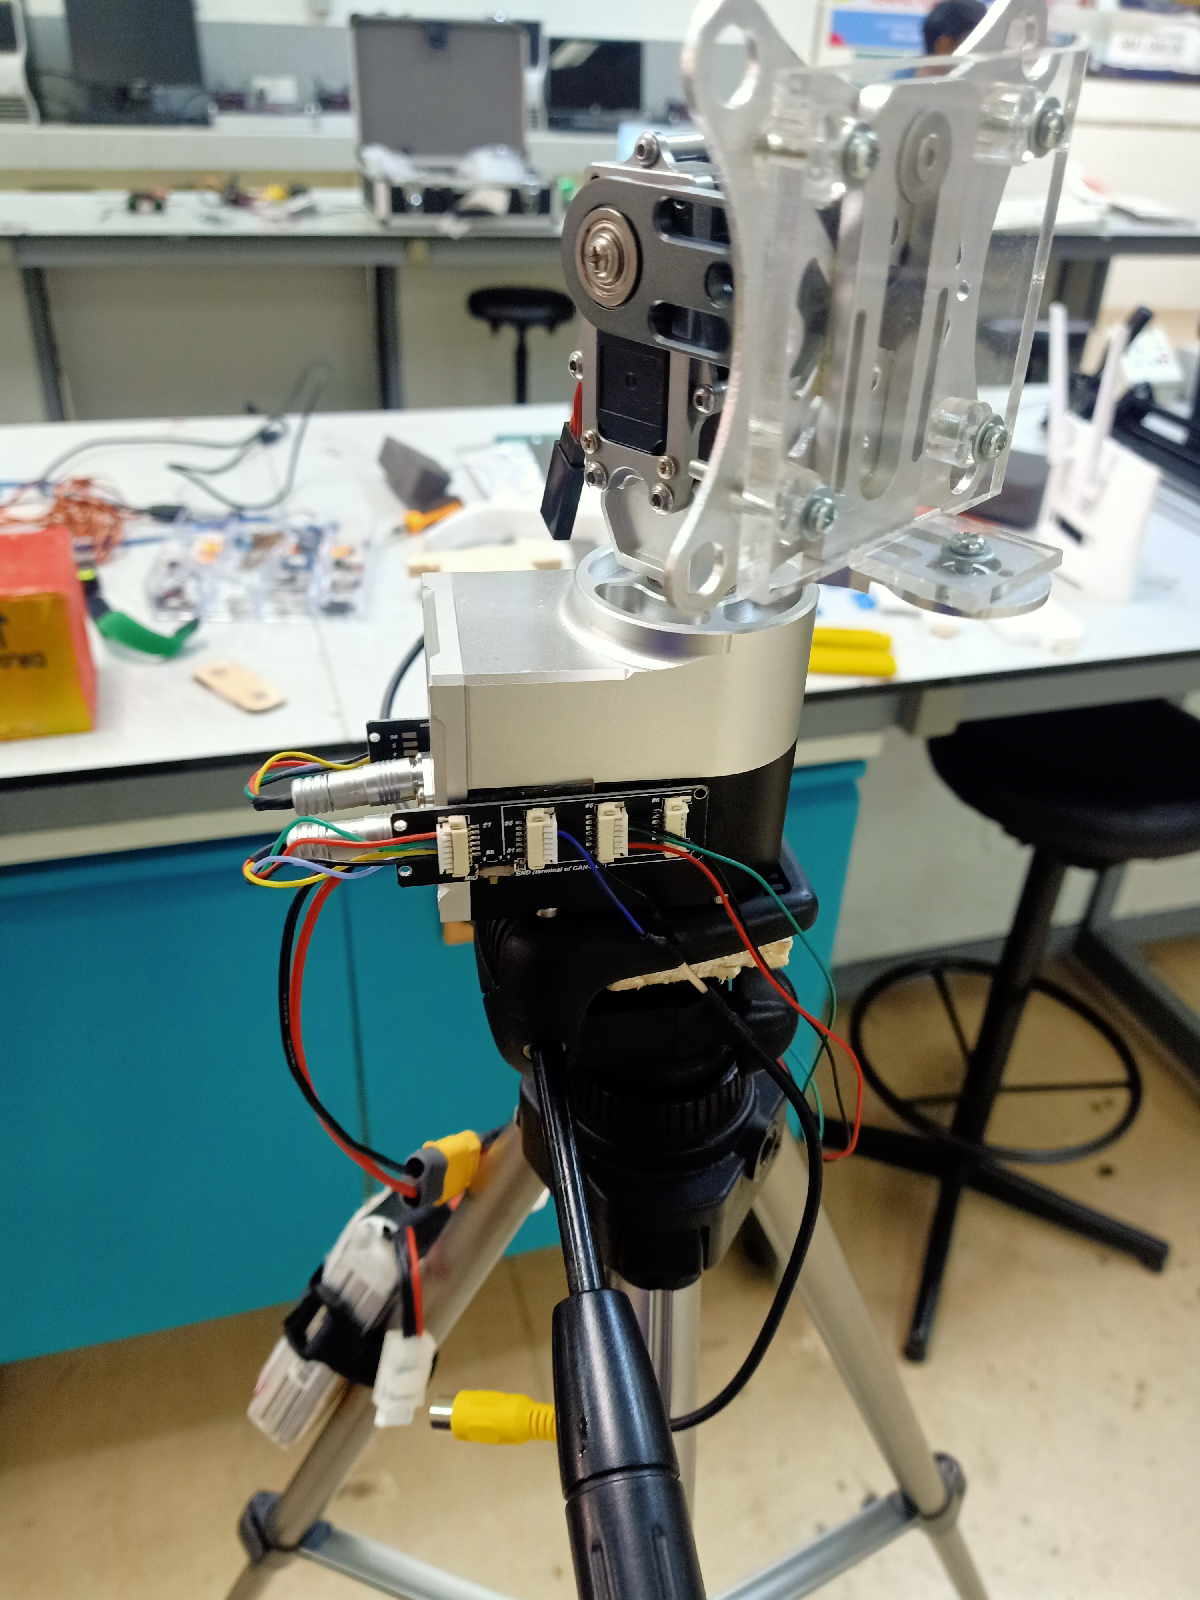
Connection from bluetooth module
OPERATION
1) Connect drone to mission planner.
2) Turn on AAT by powering up power (3S to 4S only).
3) Connect HC05 via bluetooth (Password 1234)
4) Connect with Mission planner by method below:
a) Click : Ctrl+F
b) Select Mavlink (mirror)
c) Set: COM 6 or detected port.
d) Baudrate: 9600
e) Click Connect
9) Check DLink in AAT Screen more than 0%.
10) Click Right Button on AAT to set HOME.
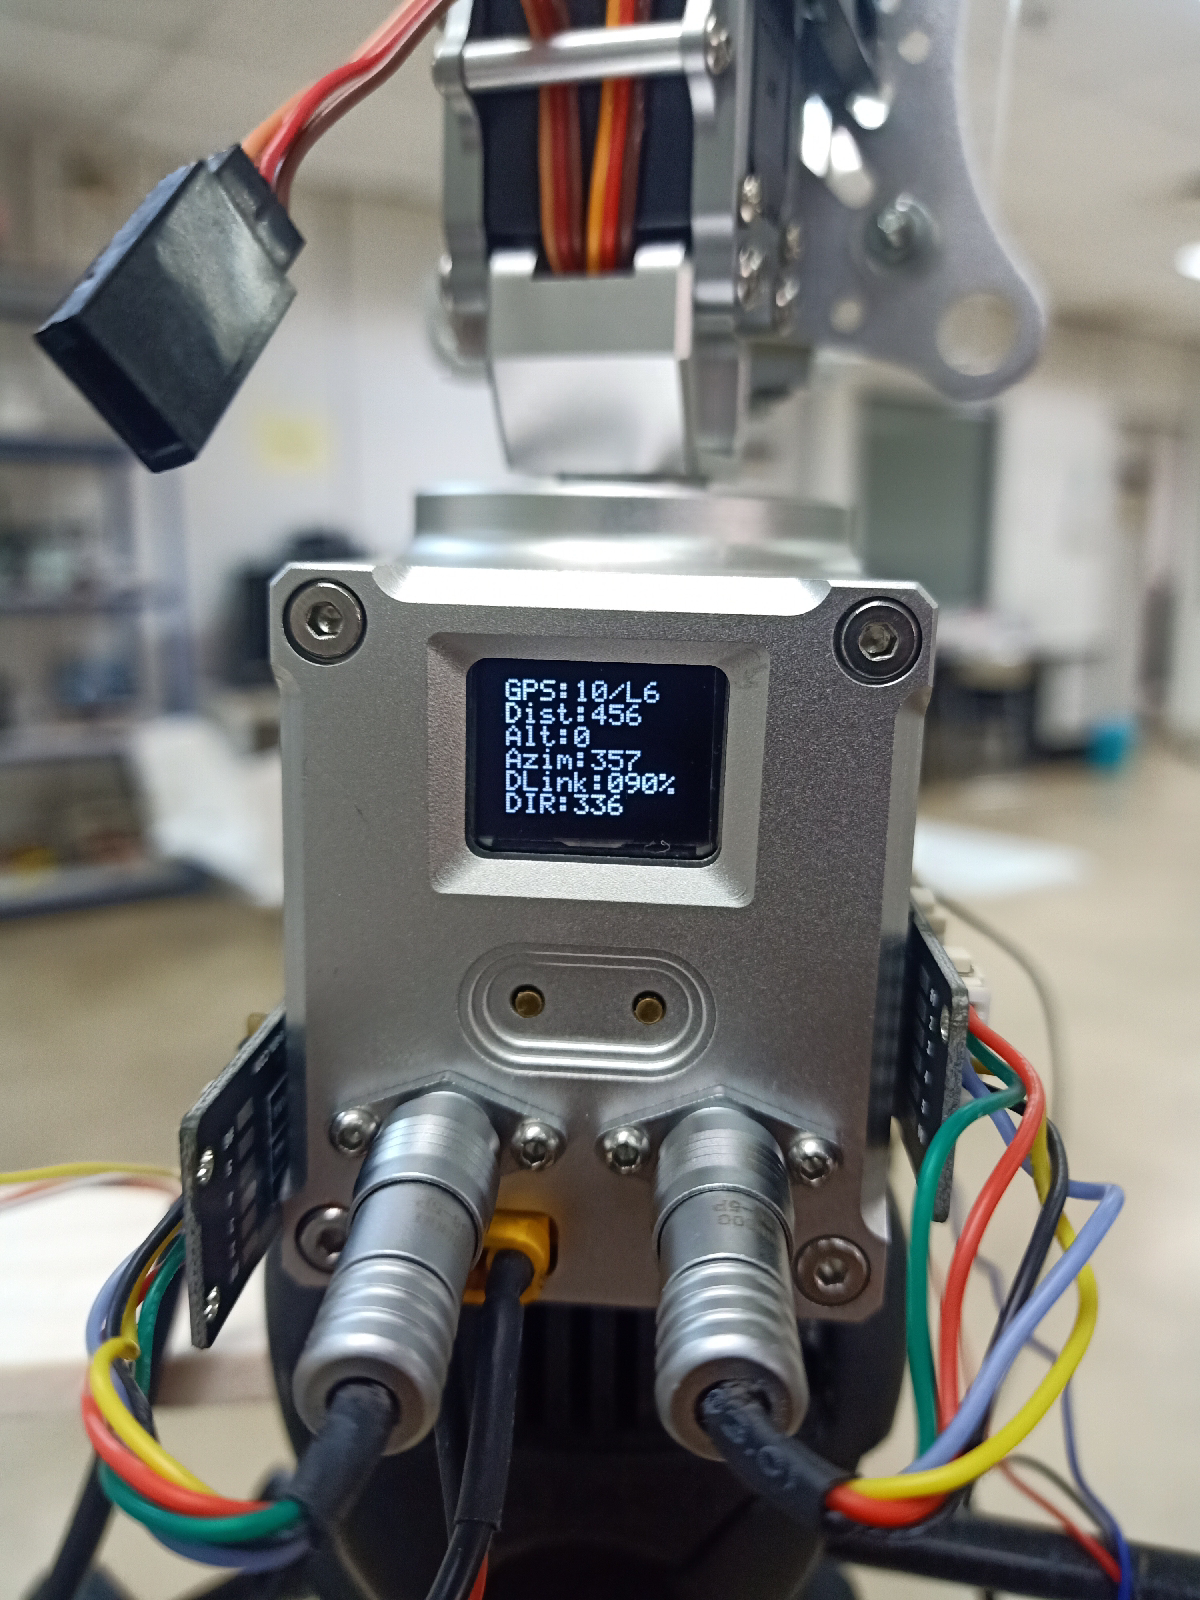
References:
2. M8N breakout

Wednesday, August 16, 2023
Ardupilot VTOL

1. Install latest firmware for fixed wing. V.4.3.7
2. Mission Planner 1.3.80
3. Pixhawk Cube orange.
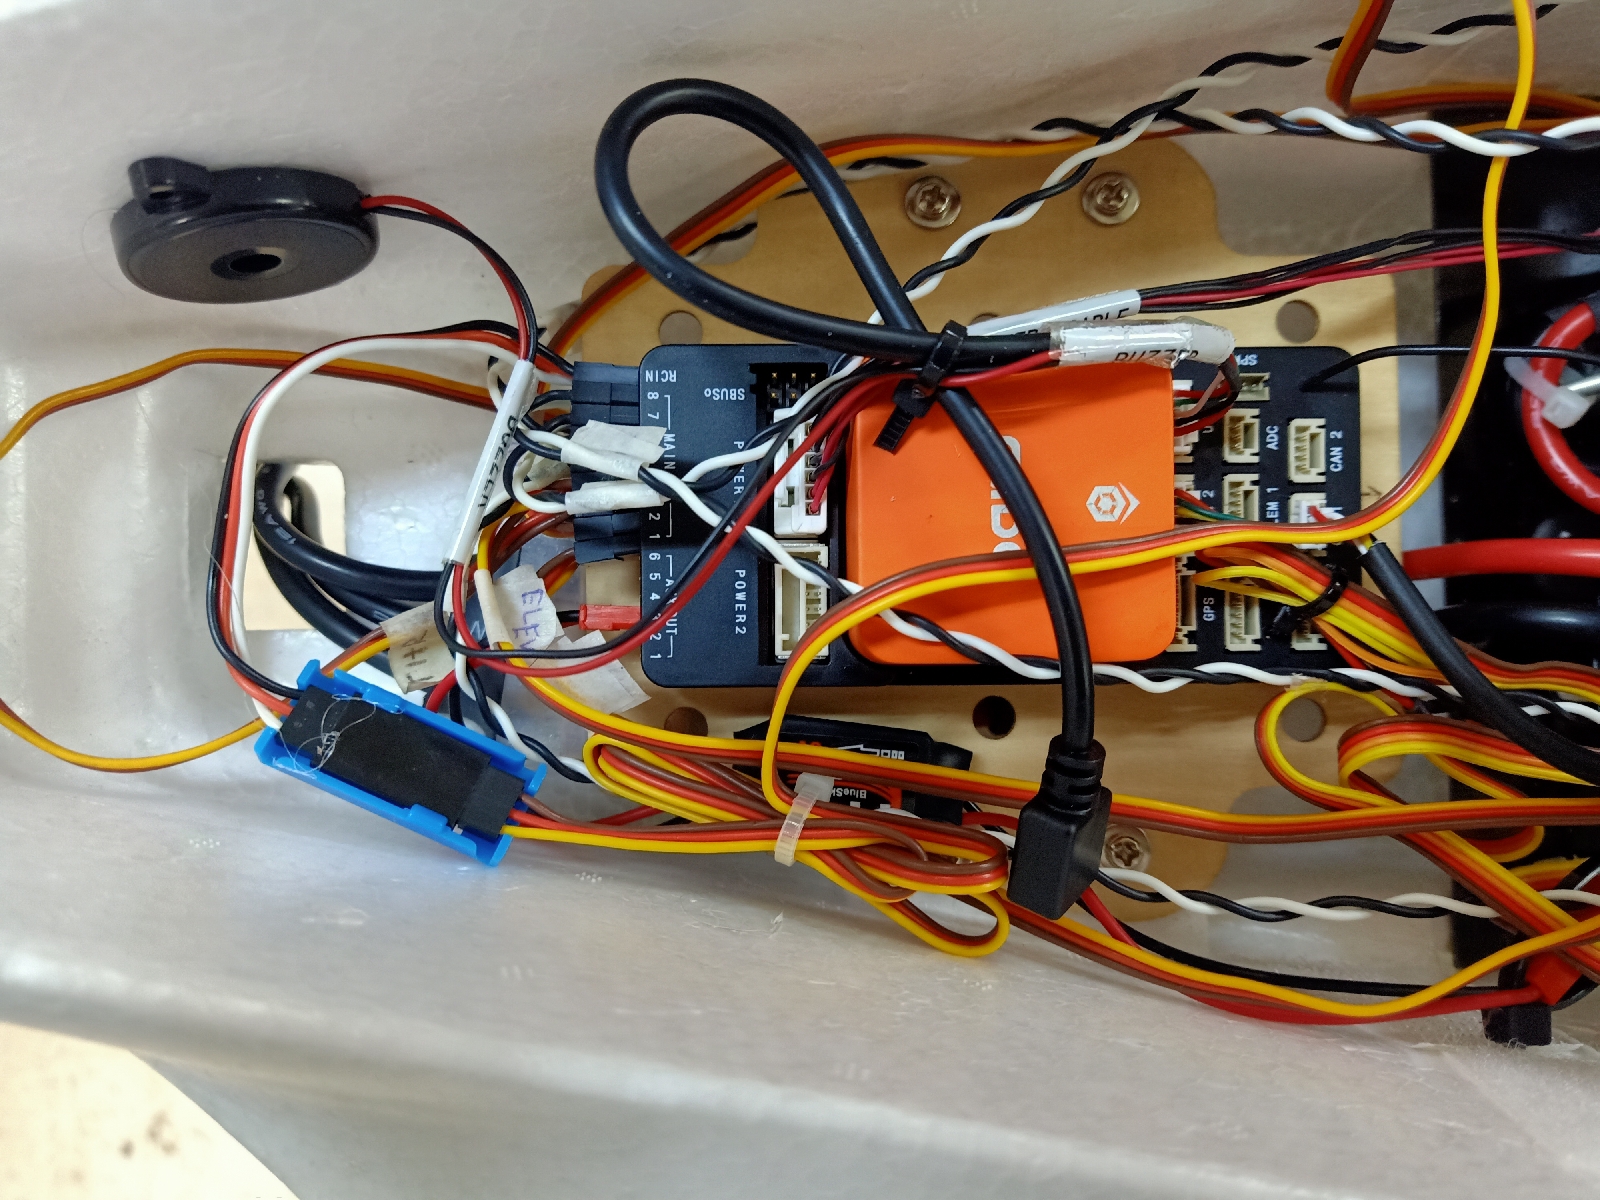
4. Set Q_Enable = 1 ; Quad Vtol Enable
5. Set Q_FRAME_TYPE = 3 ; H
Connections are:
MAIN OUT 1 = aileronR
MAIN OUT 2 = aileronL
MAIN OUT 3 = Throttle
MAIN OUT 4 = Elevator
MAIN OUT 5 = M1
MAIN OUT 6 = M2
MAIN OUT 7 = M3
MAIN OUT 8 = M4
RCIN = Receiver with SBUS
Do calibration
6. Accel calibration
7. Radio Calibration
8. FLTMODE_CH =5
9. BRD_SAFETYENABLE = 0

HERE3 GPS SETUP
https://docs.cubepilot.org/user-guides/here-3/here-3-manual
CAN_D1_PROTOCOL: 1 set virtual driver of CAN1 to DRONECAN
CAN_D2_PROTOCOL: 1 set virtual driver of CAN 2 to DRONECAN
CAN_P1_DRIVER: 1 set this parameter to enable CAN 1 bus
CAN_P2_DRIVER: 1 set this parameter to enable CAN 2 bus
GPS_TYPE: 9 set the communication protal type of GPS 1 to DRONECAN
NTF_LED_TYPES: 231 Set to DRONECAN for LED type
10. ARSPD_FBW_MIN = 17
11. ARSPD_FBW_MAX = 22
12. Q_ASSIST_SPEED = 14 (minus 3 ms from min speed)
13. Q_M_PWM_MIN = 1000
14. Q_M_PWM_MAX = 1900Calibrate ESC
15. Q_ESC_CAL = 1
16. Max throttle stick
17. Connect battery
18. Reduce throttle
Check Servo output, set min same with value min of motor 1 2 3 4
19. Q_M_SPIN_ARM = 0.1
20. Q_M_SPOOL_TIME = 2
21. Q_M_SPIN_MIN = 0.15
22. Check Flight Modes (QStabilize for Multicopter mode, Manual for fixed wing)

Then test flight for qstabilize, and qloiter. Fly well, a bit of yawing, maybe of the weathervening set.
Next, control surfaces setup,
flight modes (qloiter, stabilize, qstabilize),
Radio failsafe setup,
Power failsafe setup,
Groundcontrol setup.
Then,
Vtol mode setup.
Test flight transition.
Monday, January 30, 2023
Subscribe to:
Posts (Atom)