***************************************
Manual Control Mode
***************************************
***************************************
If you are using FSi6, use steps below.
1. Set Ch6 as SWD.
2. In mission planner, set RC6_function as Landing Gear.
3. Set Servo9_function as Landing Gear.
4. Connect servo to Aux1.
5. Reboot pixhawk.
6. Servo will move if button is clicked.
*********************************************
Automatic Control Mode (Without Remote Controller switch) 16.5.2024
*********************************************
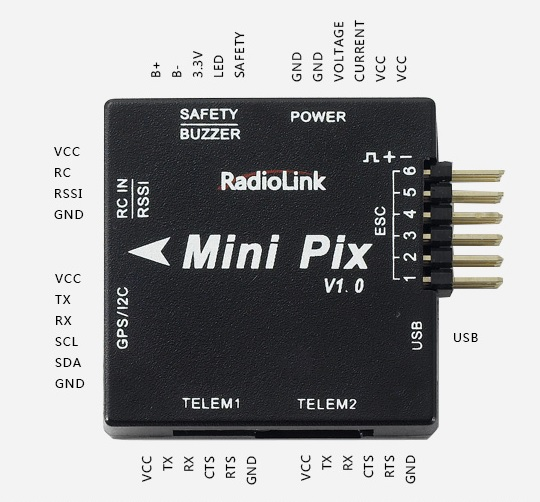
For Mini Pixhawk
1. Connect Servo to ESC 5.
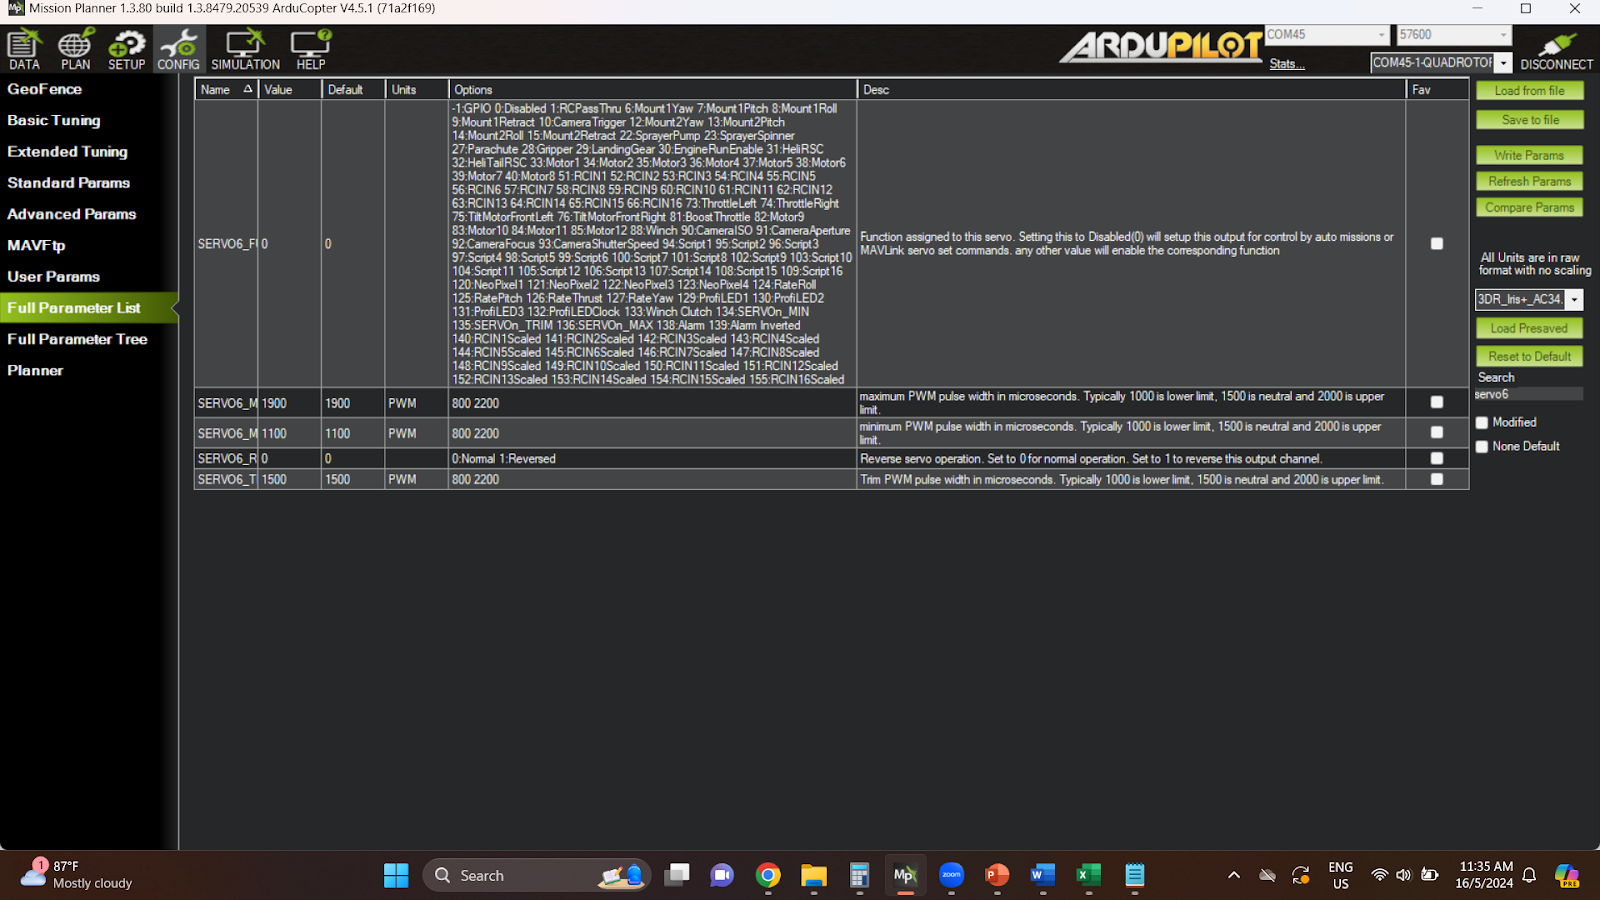
2. Config/ Full parameter list/ set 0. Why 0? This is because :
Setting this to Disabled(0) will setup this output for control by auto missions or MAVLINK Servo set commands.
3. Then check either servo is working, push the servo a bit and check if the servo has power or mechanical resistance.
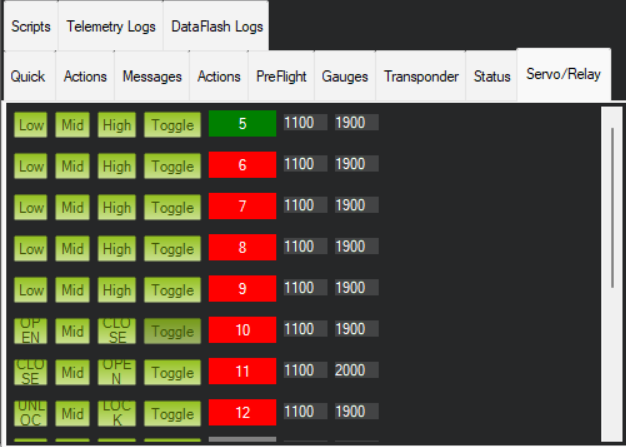
4. Then, go to front tab, and click Low / Mid/ High at Servo 5.
5. The servo should move.
Note: If the servo is not functioning as it should, then check if the servo cable is fully connected to pixhawk mini :Yellow data cable, Red power Cable dan Black Ground Cable.
End


No comments:
Post a Comment